

Monday, October 31, 2011
another Christmas card...inspiration Hero Arts Blog
Make It Monday #39: Multi-stamp Background Building

Sunday, October 30, 2011
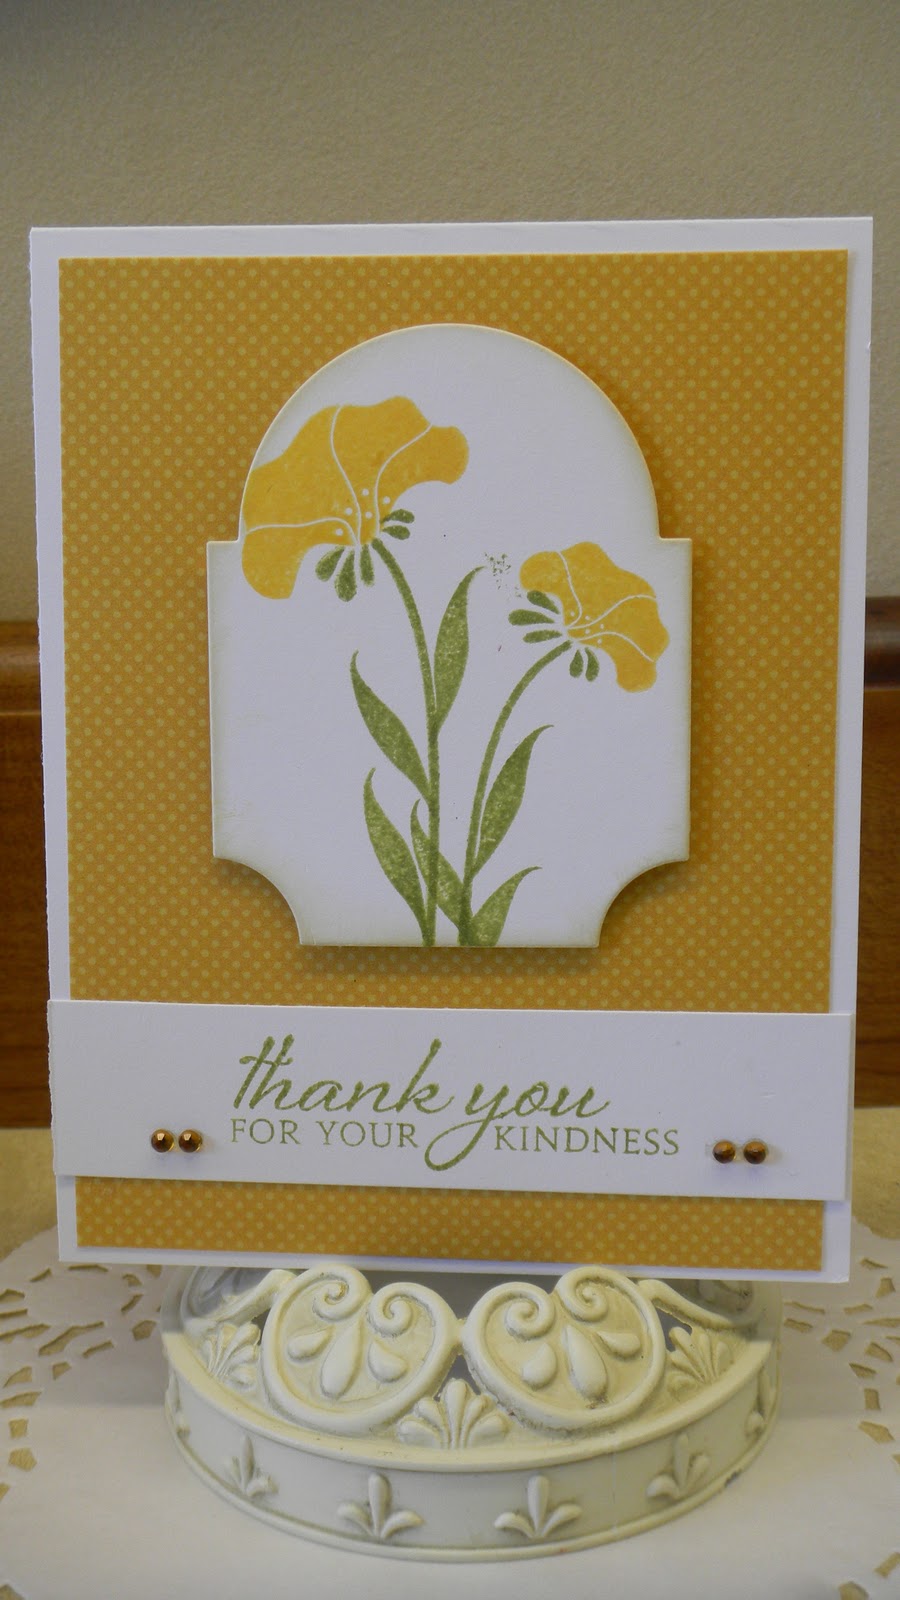
In the Meadow is AWESOME!
I was blown away by the In the Meadow stamp set and all the cards that Debbie Olson designed...so I figured why mess with a good thing...here are some of the ones I did...


Tremendous Treats: Christmas
I have loved the little Tiny Treats: Christmas and was really excited to see some of my favorite stamps be increased in size...now they are perfect for a card....I used the little bird on the fir branch and colored him in...I must admit to CAS-ing Debbie Olsons blog...she colored this little bird also. I have stamped all of the stamps from this set onto tags...I still need to color them, but they are just perfect for filling up the tags. I added some stickles to the trim of the bird hat and the little pom pom too...oh and then I couldn't resist adding some to the branches...just looks like a light dusting of sparkly snow!!


Unity Stamps and Card

A card from a PB & J Card Sketch

The sketch came from the Penny Black blog listed above...and I had some "inchies" so I decided to try my hand at it...I just received a PTI order with those darling Tremendous Treats: Christmas...I couldn't resist using them for this card...the sentiment is actually from the original Tiny Treats: Christmas.
Monday, October 24, 2011
Make It Monday #38 Brayer Techniques

Make It Monday #37: Layered Mats and Frames 2nd card

Sunday, October 23, 2011
Make It Monday #37: Layered Mats and Frames
It took me all week to try to come up with a design...I wanted to use the Half & Half Dies, but I didn't want to cut it all the way through...so I laid the die on my paper, and marked where I wanted to stop and set the die off the paper...then I ran it through the die cutter and stopped at my mark. I then used a craft knife to cut off the end of the piece...I stamped a Christmas sentiment on pink paper and stamped a row of holly at the bottom. Then I very carefully laid the smallest of the Holly Jolly dies in the two top corners and cut them out. I attached this to an avocado green paper and added some berries with a hole punch. I cut out two more sets of holly and added them at the bottom of the card...I adhered this layer to Pure Poppy CS and then to the Rustic White Card.


Wednesday, October 19, 2011
A Group Posting of Christmas Tags
I certainly didn't want to wear you all out scrolling through the post with a lot of tags, so I took a group picture...most of them were made with Love Lives Here: Holiday and also the new Tag Its' #8...oh and it looks like I threw in a Holly Jolly die tag!!


Christmas Tags
Perusing blogs like I do...I again ran into Jill Foster and really liked the tags she created...she has them on the Penny Black blog with a video...so using the stamps I had on hand I made a few and my husband was particularly impressed with them...he asked how I got them to look so antiquey!! (it's a secret, right girls?) I am still working on that technique with the Tim Holtz sponge ink blending tool and the distress inks...I think it does take a knack for doing it just right without having a big glob on the paper or...where you can actually see the rectangle shape of the foam...yeah, that is not a good look at all...So here are the tags I made trying to duplicate what Jill Foster made...


 |
| This one is NOT part of the distressing tags...but I made it and decided to include in this posting.. |


Tuesday, October 18, 2011
A series of "Thank You" cards


Make It Monday #37: Layered Mats and Frames ~ a second card

Make It Monday #37: Layered Mats and Frames

Thursday, October 6, 2011
Another card from the Love Lives Here: Holiday
I just love that cute little angel...I really am a "homespun" kind of girl...so this simple little angel really touches my heart...My BFF gave me this great Martha Stewart scalloped edge die and so I put it to good use with this card...cut it out twice in red, attached a green strip to the center to tie it all together...and then because I had the angel holding a little holly branch, I thought I would use the holly strip from Holly Jolly and emboss it...I think it turned out nice! I embossed the "peace" from Peace Be Still set...another Christmas card done.


Love Lives Here: Holiday
This is such a great stamp set...so many very cute images...however, I was having a bit of a "mojo blockage"...so I went to the designers and cased their cards...that has helped tremendously...now I can start getting creative...in the meantime...this is somewhat of a duplication of their great design work...


Make It Monday #35: Custom Stamped Washi Tape Card # 2

Tuesday, October 4, 2011
Make It Monday #35: Custom Stamped Washi Tape

Sunday, October 2, 2011
Getting Ready for Women Of Faith Conference
My daughters and I have been going to the Women of Faith for about 5 years now...it is an all day Friday event, a little three hour break in the late afternoon and then from 7 - 10pm. Saturday we go back from 9 - 5. There are fabulous speakers...so inspirational and lots of great singing...and it is a fun time to share the event with friends and family. We always take our break and go for a big walk that leads us to a restaurant where we share a meal...or one year my group went up to OHSU to visit a friend who was suppose to attend the WOF, but her son was taken to the hospital earlier that day...he ended up dying later that night. So our small group of four went to visit and give support and strength to our friend...we do what ever needs to be done. I always make some little treat to share with the girls...and we all know that DARK CHOCOLATE is good for us, right? So here is the treat for this year:


Make It Monday #34: Thick Chipboard Accents Card # 4


Saturday, October 1, 2011
Make It Monday #34: Thick Chipboard Accents Card # 3

MIM ...thick chipboard accents...the smaller butterflies are made with a Martha Stewart punch, the larger butterfly is from Butterfly Dreams. The sentiment is from Beautiful Blessings, the stamp is Harvest Berries. It seemed perfect for butterflies to be with this sentiment...they are, after all, God's perfect little miracle...
Here is a side shot of the thick butterflies...

World Card Making Day - 2nd card
Still using some of the leaf stamps from Verve, I stamped them on a Kraft card...then I added a Delightful Doily and the sentiment from Fall Elegance...a couple strips of ribbon and I called it good... I did cut the front side of the card with the edgers die #1 and I added a strip of the leaves on the edge of the inside of the card...if that makes sense!


World Card Making Day Oct. 1, 2011
I had a stamp set from Verve called Happiness Found...I totally cased a card by Laurie Schmidlin...http://justgivemestamps.typepad.com/my_weblog/2009/09/happiness-found.html I had the Claudine Hellmuth sticky back canvas from the Online Card class...so I put it to good work here... now, since I wasn't sure if this would be a card sent in an envelope or not...I chose to cut out my buttons, color them up with the ink pad and then run the twine through them...I did add several layers to the larger button die to add some dimension...Oh, I think I can enter this in PTI's MIM!
 Happy World Card Making Day...hope you all were able to escape real life for a while and create a card!

Subscribe to:
Posts (Atom)